Hog Heaven Apricot Jalapeno BBQ Sauce

Hog Heaven Apricot Jalapeno BBQ Sauce
Description:
According to Hog Heaven, “Apricot Jalapeño is delicate, savory and full of life.” With the taste of sweet apricot and a perfect kick of jalapeño, it makes for a delicious combination.
Goes With:
Seafood • Salmon • Chicken • Pork Loin • Garden Veggies • Your next craving – cause there’s no rules!
Website:
www.hogheavenbbqco.com
Honey BBQ Sauce Recipe (using ketchup)
Ketchup
Here’s another simple Honey BBQ Sauce Recipe! This time we are using ketchup as our tomato base in case you are in a hurry and don’t have all the ingredients of one of our more complicated Honey based barbecue recipes.
I’ll be honest, I’m not usually a fan of using ketchup as the base for many BBQ Sauce Recipes but if you are in need of a quick and easy recipe and ketchup is at hand, then here you go! You can make yourself a Honey barbecue sauce.
- ¼ cup butter or margarine
- 1 medium onion, diced
- 1 cup ketchup
- ⅓ cup water
- ¼ cup honey
- 2 tablespoons lemon juice
- 1 tablespoon Worcestershire sauce
- ¼ teaspoon ground black pepper
- Melt butter in small saucepan over medium heat; add onion, and saute 4 to 5 minutes or until tender.
- Stir in ketchup and remaining ingredients; bring to a boil.
- Reduce heat, and simmer, uncovered, 5 minutes.
- You can keep the leftover sauce in the frig for up to a week.
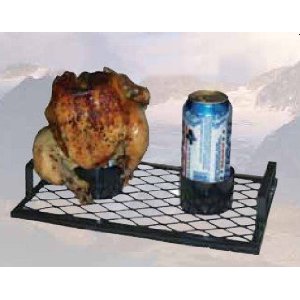
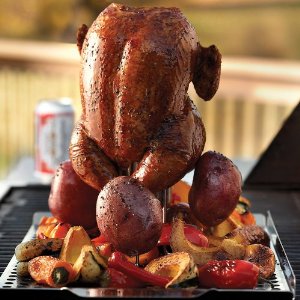
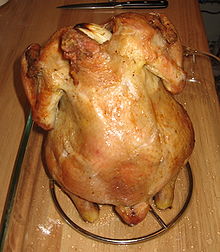
Beer Can Chicken Recipe
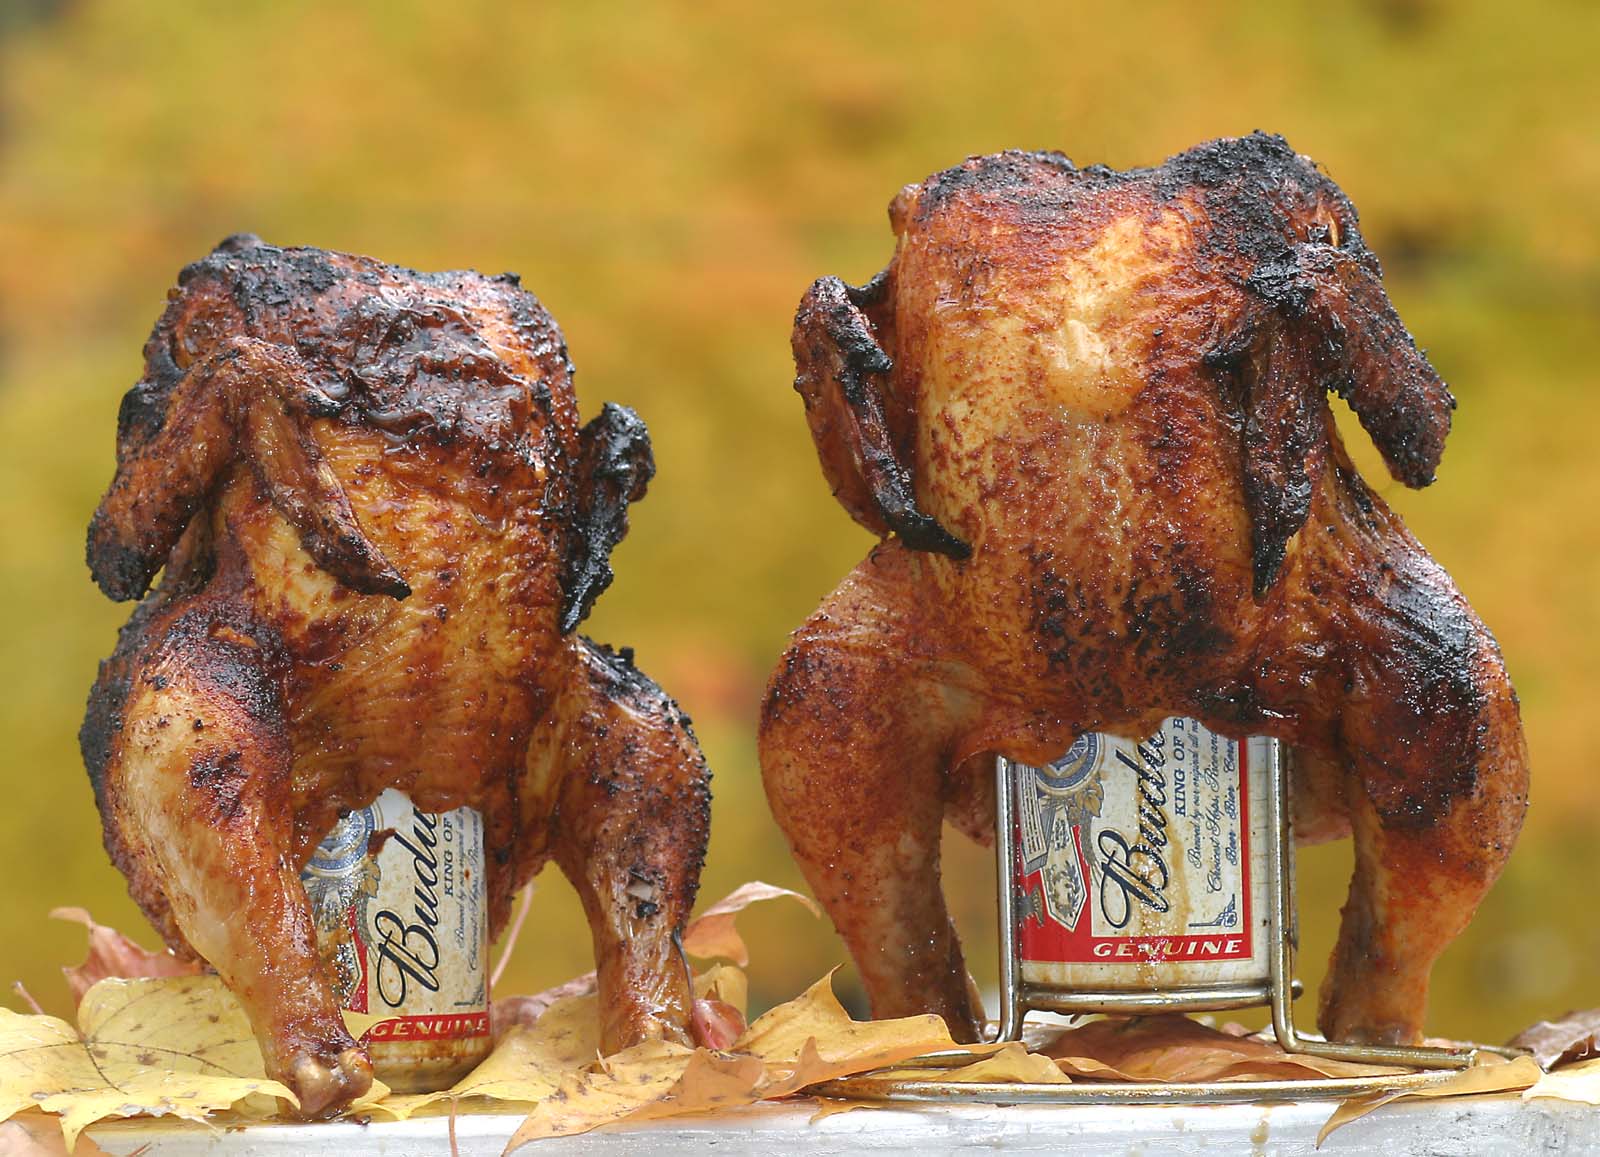
Beer Can Chicken with Bud
Now for the famous Beer Can Chicken on the Grill recipe! And what could be easier, but I have a few secret hints for everyone. And maybe because I like beer I think my Beer Can Chicken recipe is the best!. Okay, beer can chicken is nothing more than opening a can of beer and putting it into the chicken so when the beer boils as it cooks it infuses into the chicken. Uhm Uhm good! And what do you do with the other 5 beers in your six pack? You drink them while you grill, of course!
Yep, that simple! But, oh no, we beer can chicken grilling aficionados have to tinker with it to make it even better! So here’s my personal hints for the best possible beer can chicken on the grill:
Hint #1: Like Julia Child would say about wine when you cook with it, make sure you like drinking it by itself before you use it while cooking. Nothing against Bud or Bud Light, but flavor for cooking it does NOT have. Personally, my favorite beer to use is a hefeweizen beer like a blue moon or Pyramid Hefeweizen. So, I open my can of bud, drink it, then pour from the glass bottle (hard to find a Hefeweizen in a can) into the can and then use it.
RULE #1 always use good beer!
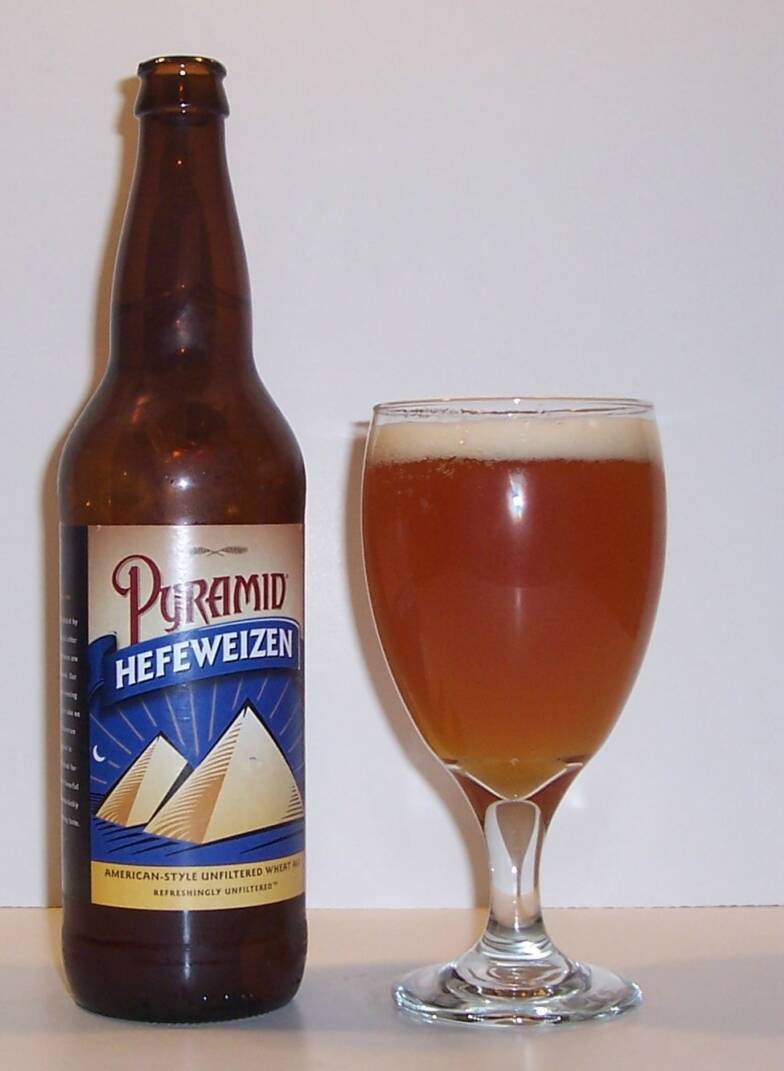
Pyramid Beer
Hint #2: Soak the chicken in your favorite beer for 15-30 minutes before you put it on the grill. Yes, I know, it’s cutting into your beer stash to soak your bird in yet another can or bottle of beer. But it’s well worth it. I use a large gallon ziplock back and only have to use one bottle of beer. Just get all the air out of the ziplock bag after you put the bird and beer in and you get maximum soaking with minimum beer wastage!
Hint #3: Soak the wood chips in beer instead of water. Yes, more beer! Now, I have to admit I don’t think this really does anything extra for flavor as I’ve done it with or without the beer soaked chips. But since this is BEER can chicken, I guess the idea is use beer anywhere possible on this bird!
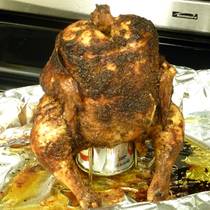
Beer Can Chicken with Aluminum Foil
Hint #4: Use aluminum foil to catch the drippings and protect the chicken from too much direct heat. This works great if you need to actually do your beer can chicken in the oven if the weather is just too bad to break out the grill.
You can also setup your grill with indirect heat like the picture below. Simply put the chicken over the pan on the right so the chicken is protected from too much flame.
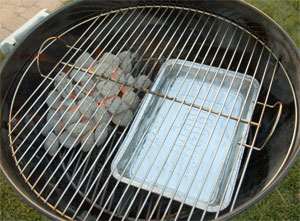
Grill Setup for BBQ
Cooking Time & Temperature: We will be cooking HOT, about 375°F to 400°F. (sometimes my grill gets hotter than that but I end up settling down around the 375 mark.
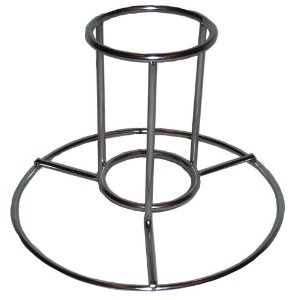
What about a good beer can stand? Well, the popularity of beer can chicken on the grill or cooked in the oven has spawned dozens if not hundreds of simple to complex and elegant beer can cooking stands. From your simple wire frame stand to elaborate non-stick surface and double chicken stands, you can find a fantastic selection to meet your needs.
Prep the Chicken for Grilling:
1.) Rinse the chicken and remove giblets etc. Rinse inside and out. I like my chicken really clean before I grill it.
2.) Bag the chicken in a ziplock bag and marinate the chicken in one bottle of good beer.
3.) Be sure it’s fully thawed. In a rush I’ve quick thawed a chicken before and put it on the grill to find out later that the outside is over done but the very center is still cold and blood red. Not good!
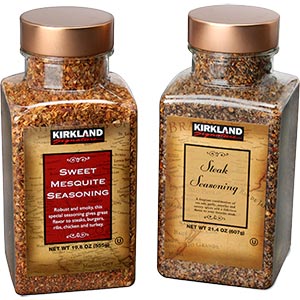
Kirkland BBQ Seasoning
4) Coat the meat with your favorite BBQ spice rub. Inside and out! With a whole chicken, I make sure and coat the outside well AND coat the inside so you get as much flavor of the spice into the meat as possible. My personal favorite happens to be a Sweet Mesquite Seasoning that I buy at the local Costco store which I’ve not duplicated with a recipe of my own yet. It has what I’d call a sweet southwest flavor. Here are a few spice rub recipes you can try or take a look at our wide selection of BBQ dry rub recipes.
Basic Dry Rub for BBQ Chicken on the grill:
Ingredients:
- 1 tablespoon ground black pepper
- 1 tablespoon ground white pepper
- 1 tablespoon sugar
- 2 teaspoon cayenne pepper
- 2 tablespoon chili powder
- 1 tablespoon ground cumin
- 1 tablespoon garlic powder
- 1 tablespoon brown sugar
- 1 tablespoon ground oregano
- 4 tablespoon paprika (the sweet kind — not the hot kind)
- 1 teaspoon dry mustard
- 1 tablespoon celery salt
- 1 tablespoon salt
Here’s a more common Chicken spice rub. Has what I’d call a more Thanksgiving flavor because of the sage and thyme in the spice mix.
Basic Chicken Dry Rub Recipe:
Ingredients:
- 1 tablespoon onion powder
- 1 tablespoon garlic powder
- 1 tablespoon salt
- 2 teaspoons whole mustard seeds
- 1 teaspoon sage
- 1 teaspoon thyme
- 1 teaspoon paprika
- 1 teaspoon black pepper
My Favorite BBQ Chicken On The Grill Recipe
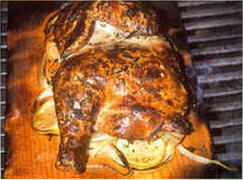
Chicken on Cedar Plank
After years of barbecuing and grilling, I accidentally tripped on what’s now my favorite for the best BBQ chicken on the grill recipe! A few years ago I tried grilling salmon on cedar planks for the first time. Now I never grill salmon any other way.
So, one day I wanted to do something different with a whole chicken and since I didn’t have any beer for the usual beer can chicken, I thought I’d try grilling it on a cedar plank. WOW! was all I could say when I took it off the grill and took the first bite. Not only did the chicken get infused with that wonderful cedar flavor, but talk about moist. I didn’t even realize how juicy the chicken would be because it was cooked with indirect heat while sitting on the blank. Now I have a hard time grilling chicken, whether whole or quartered, any other way. It’s just tooooo good!
RULE #1 SOAK THE CEDAR PLANK!
The whole purpose of using the plank is to get a good smoke. If you don’t soak the board for at least 30 minute, it’s too dry and will burn up quickly. It’s not as important to soak it that long when you do Salmon since salmon really only takes a few minutes to cook. A whole chicken on the other hand, needs about an hour to cook so you don’t want your board burning up before the chicken is done.
Cooking Time & Temperature: We will be cooking HOT, about 375°F to 400°F. (sometimes my grill gets hotter than that but I end up settling down around the 375 mark.
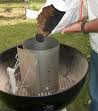
Chimney Charcoal Starter
Proper BBQ Grill: You can use a smoker or any charcoal grill as long as it has a cover, decent vents for controlling airflow. Gas grill, hummm, I’m not a fan of gas, but if you have a gas grill, okay. Needless to say, gas is easier to keep the temperature consistent but I think hardwood charcoal is the only way to go.
Charcoal: Hardwood Charcoal. It’s just the best, period. But do NOT use any lighter fluid of any kind. Use a chimney starter. I’ve been using these for years. Not only are they quick and easy, but you save the money on not having to buy starter fluid. And, most importantly, you never have the nasty smell or risk getting that starter fluid flavor into your food.
Prep the Chicken for Grilling:
1.) Rinse the chicken and remove giblets etc. Rinse inside and out. I like my chicken really clean before I grill it.
2.) Be sure it’s fully thawed. In a rush I’ve quick thawed a chicken before and put it on the grill to find out later that the outside is over done but the very center is still cold and blood red. Not good!
Kirkland BBQ Seasoning
3) Rub. Coat the meat with your favorite BBQ spice rub. Inside and out! With a whole chicken, I make sure and coat the outside well AND coat the inside so you get as much flavor of the spice into the meat as possible. You can do a lot of flavor variation at this step. You can go with lemon and/or limes for a citrus flavor, go with an herb mix, or any rub recipe you like. My personal favorite happens to be a Sweet Mesquite Seasoning that I buy at the local Costco store which I’ve not duplicated with a recipe of my own yet. It has what I’d call a sweet southwest flavor. Here are a few spice rub recipes you can try or take a look at our wide selection of BBQ dry rub recipes.
Basic Dry Rub for BBQ Chicken on the grill:
Ingredients:
- 1 tablespoon ground black pepper
- 1 tablespoon ground white pepper
- 1 tablespoon sugar
- 2 teaspoon cayenne pepper
- 2 tablespoon chili powder
- 1 tablespoon ground cumin
- 1 tablespoon garlic powder
- 1 tablespoon brown sugar
- 1 tablespoon ground oregano
- 4 tablespoon paprika (the sweet kind — not the hot kind)
- 1 teaspoon dry mustard
- 1 tablespoon celery salt
- 1 tablespoon salt
Here’s a more common Chicken spice rub. Has what I’d call a more Thanksgiving flavor because of the sage and thyme in the spice mix.
Basic Chicken Dry Rub Recipe:
Ingredients:
- 1 tablespoon onion powder
- 1 tablespoon garlic powder
- 1 tablespoon salt
- 2 teaspoons whole mustard seeds
- 1 teaspoon sage
- 1 teaspoon thyme
- 1 teaspoon paprika
- 1 teaspoon black pepper
Grilling the Chicken:
Once your grill is at the right temperature and all the coals are good and hot, put the whole chicken, breast side up, on the cedar plank and put it in the center of the grill directly over the coals. You want good heat directly under the cedar plank so the cedar will smoke through the whole cooking process. I normally have the coals lowered so they aren’t too close to the grill. Otherwise you can burn up the board if it’s too close. Chicken should be cooked (depending on size) 45 minutes to 1 hour and 15 minutes. All depends on the heat and size of the chicken. You can use a thermometer if you like, but I always use the “until the juices run clear” principle. I just cut into it and make sure it’s cooked to the center and no blood runs out. If you are using a thermometer, the chicken should bet to 170°F.
A Great Chicken BBQ Recipe for Honey Barbecue Chicken
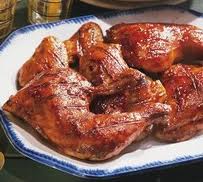
Honey BBQ Chicken
If you’ve been searching for a great chicken BBQ recipe that’s easy and delicious, then give this one a try. It’s a great Honey BBQ Chicken recipe that’s sure to spice up any meal.
- 6 boneless skinless chicken breasts
- 12 tablespoons barbecue sauce
- 6 tablespoons honey
- ½ teaspoon red pepper
- ½ teaspoon pepper
- ½ teaspoon garlic powder
- ½ teaspoon chives
- My secret hint! Boil the chicken in hot water for just a few minutes before you take it to the grill. Basically this makes sure the inside of the chicken is cooked before you finish the job grilling the chicken on the barbecue.
- When you put the chicken breasts on the gill be sure they are over medium heat.
- Generously baste them with barbecue sauce and honey, and sprinkle with the spices.
- Turn them once while cooking and cook for four to five minutes on each side.
- Be careful to not put the bbq sauce on too early as the sugar in the honey can burn.
If you interest in having a dry rub for you chicken bbq recipe then here’s one of my favorites that I use all the time.
- 1 tablespoon ground black pepper
- 1 tablespoon ground white pepper
- 1 tablespoon sugar
- 2 teaspoon cayenne pepper
- 2 tablespoon chili powder
- 1 tablespoon ground cumin
- 1 tablespoon garlic powder
- 1 tablespoon brown sugar
- 1 tablespoon ground oregano
- 4 tablespoon paprika (the sweet kind — not the hot kind)
- 1 teaspoon dry mustard
- 1 tablespoon celery salt
- 1 tablespoon salt
- #instruction#
BBQ Chicken Recipes
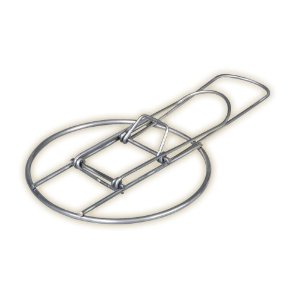
Beer can chicken with wire stand
Welcome to our BBQ Chicken recipe section so you can try your favorite BBQ Sauces and Rubs for Chicken and enjoy!
The Best BBQ Rib Sauce Recipes

BBQ Spareribs
Okay, are you ready for what I think are the best BBQ Rib Sauce recipes around? It took me a long time before I really mastered the art of barbecuing ribs. Chicken and my favorite pork shoulder are so much easier. I probably ruined more ribs learning than I’ve grilled correctly over the years.
For me, having the right BBQ rib sauce is vitally important. Even though I’m a fan of the sweeter sauces, it’s nice to rotate out and try different sauces on your bbq ribs. So, I’ve included a number of the more popular bbq rib sauce recipes for you to try.
If you are looking for all the secrets to properly slow cook your ribs, then check out my article on BBQing Baby Back Ribs.
Jack Daniel’s Rib Glaze
Ingredients:
- 1 cup Jack Daniel’s Whiskey
- 1 cup ketchup
- 1/2 cup dark brown sugar
- 1/4 cup vinegar
- 1 tablespoon lemon juice
- 2 teaspoons Worcestershire sauce
- 3 cloves garlic, minced
- 1/2 teaspoon dry mustard
- salt and pepper to taste
Directions:
- Combine all of the ingredients in a saucepan and mix well.
- Simmer for about 20 minutes and then allow to cool.
- Store in an airtight container in the refrigerator. If you make it a few days in advance the flavors will have more time to blend together which makes for a better sauce.
Mango Barbecue Sauce
Ingredients:
- 6 plum tomatoes, cut in half
- 1/2 red onion slices 1/4″ thick
- 2 poblano chili peppers
- 1 cup chopped mango
- 1/4 cup chopped parsley
- 1/4 cup chopped coriander
Directions:
- Brush the oil over the tomatoes, chili peppers and onion slices and grill them on high heat, lid up, until they have good grill marks and have started to soften.
- Remove them from the grill and chop coarsely.
- Place all of the ingredients in a food processor and chop until chunky.
- Remove half of the sauce and continue blending until smooth.
- Pour smooth sauce over meat and marinade for at least one hour.
- Refrigerate chunky sauce. Baste meat with smooth sauce while grilling. Serve with chunky sauce.
And finally, for those of you that like a mustard bbq rib sauce, I’ve included a Mustard and Beer based glaze for you to try.
Mustard and Beer BBQ Glaze
Ingredients:
- 1 12 oz can flat beer
- 4 cups prepared yellow mustard
- 1/2 cup dark brown sugar, packed
- 1 tablespoon Louisiana-style hot sauce
- 1 teaspoon sea salt
- 1 teaspoon black pepper
Directions:
- Combine all of the ingredients in a plastic bowl and store in an air tight jar in the refrigerator.
- This barbecue rib sauce will keep for several months.
- You can replace beer with lemon juice or liquor if you like.
- You can also use the Dijon style mustard for the American mustard.
- When you are ready to use, simply mop the mustard sauce on the meat or chicken and then put your favorite spice rub on. Grill or smoke for best flavor.
Bar-B-Que Ribs Recipe
BBQ Spareribs
To properly Bar-B-Que ribs of any kind, you have to learn slow and low. Meaning, cook slowly over low heat. That’s the secret to properly Bar-B-Que anything, not just ribs but any cut of meat. If you are cooking it fast, you are grilling, not Bar-B-Queing.
RULE #1 Slow cook!
I recently posted all my secrets for slow cooked BBQ in my article about BBQ Baby Back Ribs. Feel free to read through that post for all my secrets on properly slow cooking ribs. For this post, I’ll give you a shortened version of the main points:
Cooking Time & Temperature: 225°F, so allow 3 to 4 hours for baby back ribs. If you are wanting to cook pork shoulder or thicker pieces of meat, you’ll need 8-12 hours.
Charcoal: Hardwood Charcoal. (Always better than a gas grill!) And hardwood charcoal is better than your standard charcoal as it burns better in my opinion.
Hardwood for Smoke: You have to have hardwood chips for a good smoke. Mesquite just happens to be my favorite, but lot of people also like Hickory and other flavors.
Prep the Meat:
1.) Rinse. Rinse the ribs in cool water then pat dry with paper towels.
2.) Remove the membrane from the back side of the ribs if it hasn’t already been done by the butcher. If you bought this from a butcher, they can do it for you but most likely you are just buying your meat at the local grocery and they don’t bother with this step. This can be a pain, but worth it when you go to eat the ribs. (Sometimes I just get lazy and I don’t bother with this step.)
3.) Rub. Coat the meat with your favorite BBQ spice rub. If you don’t have one yet, take a look at our wide selection of BBQ dry rub recipes.
Grill Setup for proper slow cooking your Bar-B-Que Ribs:
Grill Setup for BBQ
Setup your grill for indirect cooking like the picture on the right, with 2 zones. That means the meat sits over a pan of water and not directly over the heat/coals. This the most important setup issue to properly slow cook your ribs on the grill or any meat you wish to BBQ. You want the meat to slowly cook. Remember Rule #1! SLOW COOK!
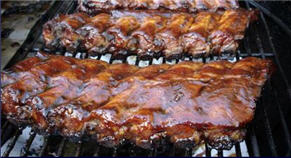
Baby Back Ribs For The Best BBQ Ribs On The Grill
BBQ Spareribs
Are you ready for the best BBQ ribs on the grill recipe? This is our first article in our new section for BBQ recipes (i.e. the actual grilling recipes for meat, ribs, chicken, etc.) so you can compliment all of the great BBQ sauce recipes we’ve been stockpiling for years now.
As a challenge to everyone, I’ve picked what’s probably the hardest thing to do. Slow cook BBQ ribs on the grill. For years I used to boil them in a brine of beer and spices as slow cooking ribs is hard to do because it’s hard to keep them moist. I don’t know how many times I’ve ruined ribs by letting them dry out. Hence my personal love for slow barbecuing pork shoulder most of the time. It’s just easy. But everyone likes ribs and the best (at least my opinion) and the most common now is Baby Back Ribs. So, Baby Back Ribs it is for our first step by step guide on proper slow barbecuing.
RULE #1 Slow cook!
The whole purpose of proper barbecuing is slow and low heat. That allows the meat to NOT overcook but to properly break down the fats, mylin, and other connective tissue in the meat to slowly melt away leaving that awesome tender texture we love about great BBQ.
Cooking Time & Temperature: We will be cooking low and slow at about 225°F, so allow 3 to 4 hours for baby back ribs. Thicker, meatier slabs take longer and if you use rib holders so they are crammed close to each other, add another hour.
Chimney Charcoal Starter
Proper BBQ Grill: You can use a smoker or any charcoal grill as long as it has a cover, decent vents for controlling airflow. Gas grill, hummm, I’m not a fan of gas, but if you have a gas grill, okay. Needless to say, gas is easier to keep the temperture consistent but I think hardwood charcoal is the only way to go.
Charcoal: Hardwood Charcoal. It’s just the best, period. But do NOT use any lighter fluid of any kind. Use a chimney starter. I’ve been using these for years. Not only are they quick and easy, but you save the money on not having to buy starter fluid. And, most importantly, you never have the nasty smell or risk getting that starter fluid flavor into your food.
Chip Smoker
Hardwood for Smoke: 8 ounces by weight of hardwood chunks or chips. It doesn’t matter how much meat you are cooking, half a pound of wood is enough. I prefer chunks of Hickory or Mesquite. For whatever reason, Mesquite is my favorite. Be sure to soak the wood chips or chunks for at least 15 minutes so they smoke nicely and don’t just catch on fire when you put it on the coals.
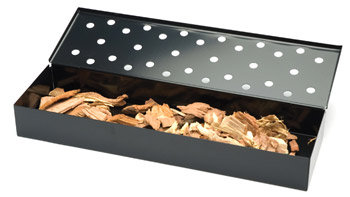
Wood Chip Smoker Box (Optional): I’ve also used a wood chip smoker box. Home Depot had it and I gave it a try and they do work nicely. I don’t always use it as it can be a bit of a pain getting it on and off the coals as you need to add more charcoal as you slow BBQ.
Tools Needed:
1 pair of long handled tongs
1 sauce brush
1 oven thermometer
Prep the Meat:
1.) Rinse. Rinse the ribs in cool water then pat dry with paper towels.
2.) Remove the membrane from the back side of the ribs if it hasn’t already been done by the butcher. If you bought this from a butcher, they can do it for you but most likely you are just buying your meat at the local grocery and they don’t bother with this step. This can be a pain, but worth it when you go to eat the ribs. (Sometimes I just get lazy and I don’t bother with this step.)
3) Rub. Coat the meat with your favorite BBQ spice rub. You can make a basic Kansas City Style Rib Rub using this recipe. Or, take a look at our wide selection of BBQ dry rub recipes.
Kansas City Style Rub Recipe
Ingredients:
- 1/2 cup Brown Sugar
- 1/4 cup paprika
- 1 Tablespoon black pepper
- 1 Tablespoon salt
- 1 Tablespoon chili powder
- 1 Tablespoon garlic powder
- 1 Tablespoon onion powder
- 1 Teaspoon cayenne
Simply mix all the ingredients together.
Grill Setup for BBQ
Grill Setup and slow barbequing:
4.) Setup your cooker for indirect cooking with 2 zones. That means the meat sits over a pan of water and not directly over the heat/coals. This the most important setup issue to properly grill ribs on the grill or any meat you wish to BBQ. You want the meat to slowly cook. Remember Rule #1! SLOW COOK!
5.) Keep your cooking temperature between 225°F and 250°F. Use your intake and exhaust vents to control the heat on your grill. Intake vents are more effective than exhaust vents for controlling the temperature because they reduce the supply of oxygen to the coals. Take your time getting the temperature right as this is the most important part of the whole process. Cooking at 225°F will allow the meat to roast low and slow, breaking down the collagen in connective tissues and melting fats without overcooking the meat. Try to keep the temperature as close to 225°F as possible. Don’t go under 200°F and try not to go over 250°F or you’ll either under cook or over cook the meat.
6.) Sprinkle your soaked hardwood chips on the fire. Don’t dump all your hard wood chips on the coals all at once. I like to put about 1/4 of them on at a time. Let them finish smoking and then put another handful on throughout the cooking process. That way, you get a nice slow smoking throughout the cooking process. Any one handful of chips burns up fairly quickly unless you are using the wood chip box. But dumping them on in 4 different batches during the cooking process seems to work well for me. I like the meat to be well smoked but you can over smoke. I’ve never managed to over smoke the meat, but I’ve heard you can do it by constantly putting too much wood onto the fire.
Some hints and tricks:
Spray bottle with apple juice: One technique to keep the meat moist is to have a spray bottle with apple juice in it. Once in awhile, simply mist the meat with the apple juice to keep the meat moist.
Wrap ribs in aluminum foil: This one is an age old trick to keep some of the juices in the meat but be careful as this can speed up the cooking process because you are in essence steaming the BBQ. When I’ve done this, I often make good size holes in the top of the aluminum foil so you balance keeping moisture in but not overcook or steam the ribs. I wouldn’t do this for longer than an hour of the cooking process as you can’t get the meat smoked if it’s wrapped in aluminum foil.
Recent Comments